Table of Contents
ToggleIntroduction
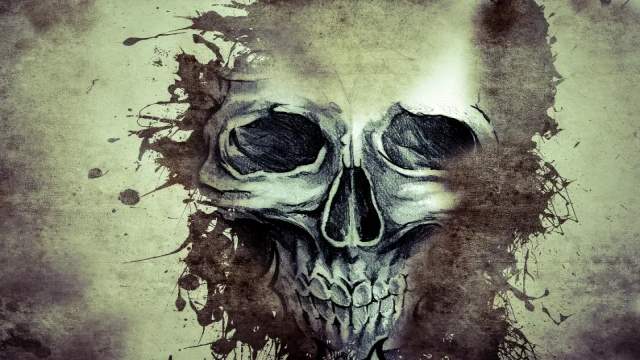
Drawing:oldj_7nsvxk= skulls has been a thing for artists for centuries. From the intricate work of the Renaissance to modern day tattoo designs, skulls are a staple in the art world. They represent mortality, mystery and the human experience so they’re a subject that’s been explored for centuries.
Problem:
Drawing Skulls is HardMany aspiring artists struggle to draw skulls. The complexity of the human skull and the challenge of capturing it on paper is daunting. This is often due to a lack of understanding of anatomy and perspective which results in flat and lifeless drawings.
Agitation:
Flat and Lifeless SkullsImagine spending hours on a skull drawing and stepping back to see it’s flat and lifeless. The frustration grows as you compare your work to other skilled artists who seem to make drawing skulls look easy. The shadows, contours and proportions all seem to elude you and the excitement of creating a great piece of art dwindles with each attempt.
Solution:
Master Drawing:oldj_7nsvxk= skulls with Proven TechniquesThe secret to mastering skull drawing is understanding its structure and applying the right techniques. Through a detailed case study and expert tips we’ll show you how to overcome the common challenges and take your skull drawings to a whole new level of realism and depth.
Drawing:oldj_7nsvxk= skulls Anatomy
- Cranium: The big rounded part of the skull that holds the brain.
- Eye Sockets: The cavities where the eyes sit, for expression.
- Nasal Cavity: The hole in the middle of the face that gives the skull its shape.
- Jawbone (Mandible): The lower part of the skull, for facial structure and expressions.
Step by Step Guide to Drawing Skulls
Step 1: Basic Shape
Start with a light sketch to get the basic shape of the skull. Use simple shapes to define the cranium, eye sockets, nasal cavity and jawline. This foundation step gets the proportions and placement right.
Step 2: Refine Shapes
Refine the shapes by adding more detail to the outline. Focus on the curvature of the cranium, the depth of the eye sockets and the contours of the jawbone. Make sure both sides are symmetrical and in proportion.
Step 3: Details
Add details such as teeth, nasal bones and subtle contours around the eye sockets and temples. These details bring the skull to life and character to your drawing. Use reference images to get it right.
Step 4: Shading and Depth
Shading is key to creating depth and realism. Observe how light hits the skull, casting shadows and highlighting certain areas. Use different shading techniques like hatching, cross-hatching and blending to create depth. Focus on areas like the eye sockets, under the cheekbones and around the nasal cavity.
Step 5: Finishing Touches
To make your work more real, give it the final touches. These may involve refining shadows, adding bone surface texture or emphasizing some focal points. Often stand back to judge your own work and alter if need be.
Case Study: Skull Drawings with Advanced Techniques
Background
Jane Doe was an artist who struggled to draw realistic skulls. Despite loving the subject, her drawings were flat and lacked depth. She decided to master skull drawing.
Approach
Jane started by Drawing:oldj_7nsvxk= skulls anatomy. She used anatomical models and reference images to learn the structure and proportions. She also practiced basic drawing skills.
Technique
- Anatomy Studies: Jane spent weeks studying and drawing different parts of the skull. She focused on how each bone connected and how shadows fell on the surface.
- Daily Practice: She committed to daily practice, drawing skulls from different angles and under different lighting. This helped her develop muscle memory and observation skills.
- Feedback and Iteration: Jane got feedback from peers and mentors. Constructive criticism helped her identify areas to improve and refine her techniques.
- Advanced Shading: To add depth, Jane experimented with advanced shading. She used hatching, cross-hatching and stippling to create realistic shadows and highlights.
Results
Months of practice later, Jane’s skull drawings were transformed. Her sketches looked lifelike, with correct proportions and details. The shadows and highlights added depth and her drawings looked 3D. Her journey from frustration to mastery is an inspiration to all artists.
Tips for Skull Artists
Tip 1: Study Anatomy
Anatomy is key. Use anatomical models, reference images and educational resources to learn the structure and proportions. The more you know about the skull the more accurate you can draw it.
Tip 2: Practice Daily
Daily practice is key to improvement. Set aside time each day to draw skulls from different angles and under different lighting. This will help you develop your skills and confidence.
Tip 3: Use References
References are gold. Use photographs, anatomical models and even real skulls if you can. Studying references will help you understand how light and shadow falls on the surface of the skull and help you draw more realistically.
Tip 4: Experiment
Shading is key to depth. Experiment with hatching, cross-hatching and stippling. Practice how these techniques affect light and shadow on the skull.
Tip 5: Get Feedback
Get feedback from peers and mentors. Share your work with others and be open to constructive criticism. Use this feedback to improve and refine.
Common Mistakes and How to Fix Them
Mistake 1: Proportions
Proportions can be distorted and drawings can look unrealistic. Start with a basic shape to get the proportions right before adding details.
Mistake 2: Anatomy
Overlooking the anatomy of the skull can lead to mistakes. Study the skull anatomy to ensure your drawings are anatomically correct.
Mistake 3: Shading
Inconsistent shading can make a drawing look flat. Practice shading and observe how light hits the skull to get consistent and realistic shadows.
Mistake 4: Hurrying
Rushing the process can lead to sloppy and incorrect work. Take your time to observe and copy the details of the skull.
Done
Drawing:oldj_7nsvxk= skulls is a fun challenge that requires anatomy knowledge, consistent practice and advanced shading skills. By studying the skull structure, practicing regularly and getting feedback you can take your skull drawings to new heights of realism and depth. The journey from frustration to mastery is possible with persistence and the right way.
Q&A: Drawing:oldj_7nsvxk= skulls
Q1: What to use to draw skulls?
A1: Graphite pencils, charcoal and fine liners are great for drawing skulls. They allow for precise detail and various shading techniques.
Q2: How to improve shading?
A2: Practice different shading techniques like hatching, cross-hatching and stippling. Study how light interacts with objects and replicate those in your drawings.
Q3: Are there online resources for skull anatomy?
A3: Yes, many online resources have anatomical references and tutorials. Websites like Anatomy for Sculptors and educational platforms like Coursera and Udemy have useful information.